Installation
To prepare for the setup of Be-Generic Code Base, we installed the following software:
- Visual Studio 2022, which you can download for free via https://visualstudio.microsoft.com/downloads/
- MSSQL 2019 Express Edition, which you can download for free via https://go.microsoft.com/fwlink/p/?linkid=2216019&clcid=0x409&culture=en-us&country=us
- In MSSQL 2019 Express Edition, we created a new empty database named BeGenericSample
After the preparations were done, we followed these steps to open project in Visual Studio:
- Using GitHub, we forked Be-Generic main repository, found on https://github.com/be-generic/be-generic
- We started up Visual Studio and on the start screen selected Clone Repository
- In the field "Repository location", we entered https://github.com/be-generic/be-generic and clicked Clone
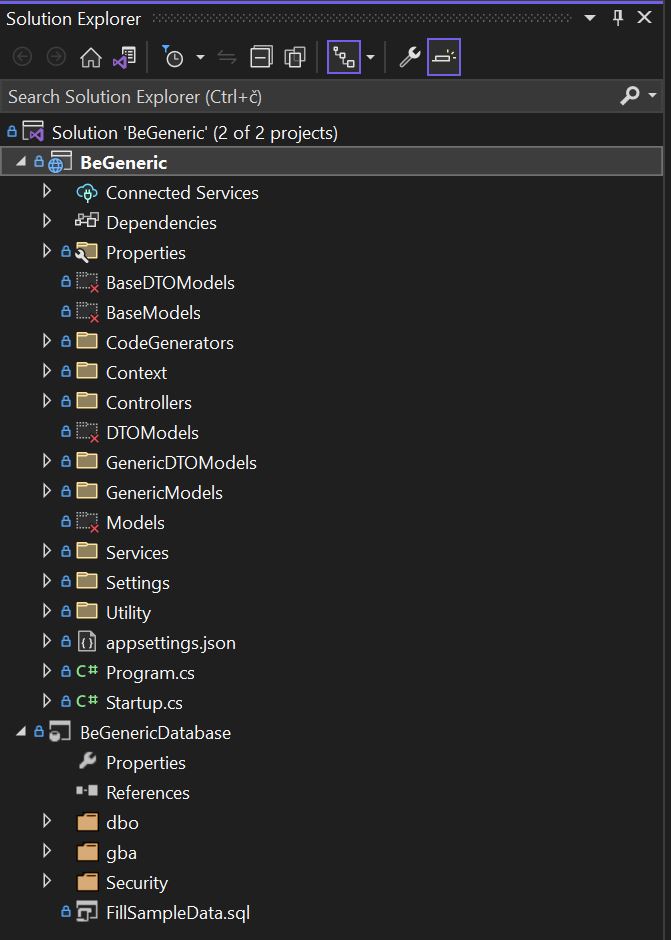
- The solution contained two projects just like on the image below. In the solution, we corrected connection string in both appsettings.json and appsettings.development.json to point to the previously deployed empty database
With this, the first part of installation is done. Next, we need to prepare the database and fill it with Be-Generic schema and tables. We did this by doing the following in Visual Studio while the solution was opened:
- By performing a Right-Click on "BeGeneric Database" project, we opened a pop-up menu
- In the menu, we selected option to perform "Schema Compare..."
- When the Schema comparison window opened, we selected our "BeGeneric Database" project as a source of comparison and newly created database as target
- After that, we pressed button Compare and waited for the comparison to finish
- When comparison finished, we pressed button Update to add new schema elements to the empty database
- At the end, we copied the contents of the file FillSampleData.sql within "BeGeneric Database" project and ran it in SQL editor of our choice (SQL Server Management Studio) while it was connected to the new database
After completing the two main parts, we created our custom data structure in dbo schema, like we would normally do (schema can be changed to any other name, if you desire so). Our data contained the following tables:
- AbsenceCategory: Code list of absence category types
- Employee: List of employees
- Department: List of departments
- Document: All uploaded documents
- Job: Code list of jobs
- EmployeeAbsence: List of absences employees (many-to-many relationship between employee and absence category)
- EmployeeAbsenceDocument: List of absence-related documents
- EmployeeDocument: List of employee-related documents
- EmployeeJobHistory: List of jobs that the employees had in past
- EmployeeSalary: List of employee salaries