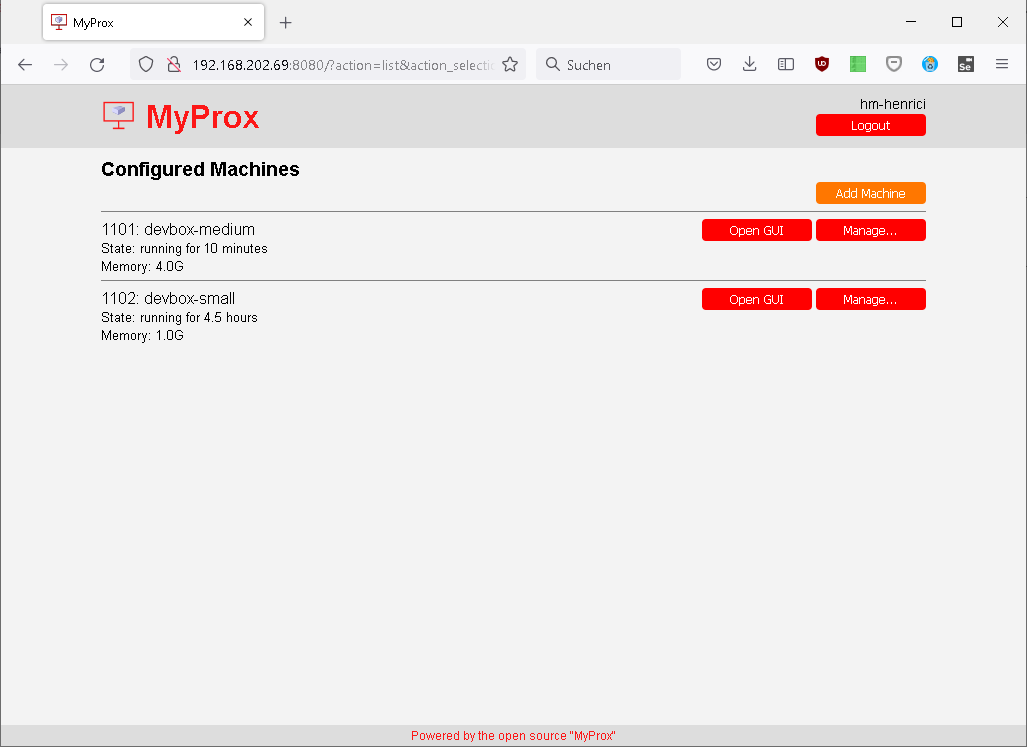
A simple web frontend for accessing and managing VMs running on Proxmox VE. It is targeted on end-users.
- List all VMs a user has permissions on
- Manage VM state, e.g. starting and stopping
- Open SPICE console (virt-viewer)
- Authentication against Proxmox (username/password, OIDC)
- Support connecting to multiple Proxmox nodes/clusters
- Web frontend has responsive design
- Does not require root privileges
- Built on light-weight CherryPy framework
- No JavaScript bloat; no external font/JS includes
- Simple installation using pip, few dependencies
Install using PyPi:
pip3 install myproxAfter installing "MyProx" as shown above, just execute the tool to get it running:
myproxConfiguration can be done in the file /etc/myprox/myprox.conf. A commented example file can be downloaded at https://github.com/towalink/myprox/blob/main/src/myprox/templates/myprox.conf.
See additional screenshots in the "screenshots" folder.
If your Proxmox installation is set up to authenticate against an OIDC provider like Keycloak, you can still use MyProx. MyProx still authenticates against your Proxmox cluster but no longer based on username and password.
You need to set the URL of your MyProx installation as a valid redirect URL in the Proxmox client configuration of your identity provider, e.g. https://myprox.mydomain.de/redirect_uri. Then set the OIDC related options, at least the Proxmox realm to be used. Now you can leave username and password fields empty in the login form to authenticate against your OIDC provider.
In case you encounter any bugs, please report the expected behavior and the actual behavior so that the issue can be reproduced and fixed.
Clone this repo to your local machine using https://github.com/towalink/myprox.git
Install the module temporarily to make it available in your Python installation:
pip3 install -e <path to directory with setup.py>
- AGPL3 license
- Copyright 2022 © Dirk Henrici.
- Note: This project is not affiliated with Proxmox, it just accesses its REST API.